Sunday, January 29, 2012

What A Week, I'm Exhuasted

What a week it was this last week....
Back to school has been full on, Rhyley's teacher got them right in the swing of things &
sent homework home the first day back, much to my horror!
We usually have a week before the dreaded homework starts but not this year!, oh well
you can't win them all.

So Thursday was a public holiday. We spent a lovely relaxing day at home together since it was Australia Day, in all honestly it was too hot to go out & join the festivities of the day.
On Friday at school they had a fun filled day celebrating Australia Day with Lamington
making, thong throwing & watching the movie Red Dog, Rhyley had a great day & really enjoyed the day with his school friends.

This weekend we decided to get Rhyley a new bed; a double bed - so it can used as a guest bed when we have family visit, after Jason put it together we wrapped the lights we used on the Christmas tree around the bedhead & across the window.
Rhyley loves it! - which what really matters I plan on getting a couple of thin bookcases to put on either side of the bed for storage of books, clock, toys & other knick knacks.

This weekend I also went shopping for a Closet Cupid gift for one of the ladies on a parenting site I'm apart of.
What is a Closet Cupid?
Well it's the same as a Secret Santa but we are sending each other a little Valentine's Day gift.
If you don't know how a Secret Santa works it's where you are given a name & you go out & buy a little gift for that person & give it to them.
The thing is we are all over the world so we send our gifts then post a photo of our gift.
So we all get to see what the others have received.
It's alot of fun & really exciting to get a gift & not know exactly who it's from until you open it.

So I decided to make a little handmade goodie for my Closet Cupid gift & when I saw the awesome Commercial Vectors Miss Mint had just released over at Peppermint Creative I knew exactly what I was going to do.

So here's what you'll need for this craft.

Materials:

Firstly I purchased Treats & Friends Word Art by Tay Silver for only $0.99!
or grab the Valentine XO BlockART  freebie also by Tay Silver (hurry it won't be free for long!)
Photoshop Elements or similar
Printer
A Ceramic Mug
Ceramic Paints I used Mont Marte brand
Paintbrush
Scissors
Sticky Tape
Tape Measure/Ruler
Pencil

Method:

1. Measure your mug so you can resize the vectors so they will fit nicely on the mug.
2. Open up you vector (I used the PNG file) in your editing software.
3. Resize the images & arrange them on an A4 page for printing (I cut the cake off so I could place it above the text.
4. When you have all your images on your A4 page you are ready to print.


 5. After printing, cut out your image & turn it over to white side, take your pencil & rub all over the piece of paper (doing it like this is easier than trying to cut everything out) 
 
 
6. Position the paper on the mug & tape it in place so it doesn't move. 
7. Then carefully trace around the image onto the mug, remove the paper. 


8. Using your paints - paint over the image on your mug when you are happy with it follow the directions on the pack of your paints - mine required me either to coat with a gloss & bake at 150°C for 30 minutes OR to bake at 150°C for 30 minutes, let mug cool then coat with gloss & rebake at 150°C for another 30 minutes. If your paints have similar instructions I highly recommend painting, baking, glossing & rebaking! 
 
9. Enjoy your new, spiffy custom made mug - give it as a gift or keep it for yourself!

In the last couple of weeks I also got a couple of new pages done.
Unfortunately I haven't had a chance to do more because I have been battling some major unexplained fatigue lately so I'm off to the doctor's next week.
But in the meantime here are my latest pages:

The first one is of Rhyley & Coop opening their joint Christmas present I used Miss Mint's beautiful kit Christmas Past

 Credits are here

This one I made for Peppermint Creative's Pimp My Page Challenge for January. I decided to scrap about our very unwelcome snake visitor earlier this month.
 
Credits are here

It's time to get some sleep.
Until next time,


    Tuesday, January 24, 2012

    Back to School

    Well yesterday marked the first day back to school!
    It was Rhyley first day of Grade 5! Really can't believe my little boy is in Grade 5 already
    he is growing up WAY too fast it really is bittersweet to think this year will be his 10th birthday!
    Seriously where did it go but it is very exciting that he will be double digits this year.

    So because it was back to school I made Rhyley a special breakfast to start the new
    school year off on a yummy start with a super delicious pancake known as David Eyre's Pancake!
    I saw the recipe on a Martha Stewart Show repeat and we had tried it before so
    I thought this would be a special treat for back to school.

    Here is the recipe- I used 2% milk & honestly it made no difference at all & only half as much butter. You can view the original recipe here.

    David Eyre's Pancake
    Ingredients 
    1/3 cup of plain flour
    1/2 cup of milk 
    2 large eggs
    Pinch of fresh nutmeg (ground nutmeg is fine)
    4 tablespoons of unsalted butter
    2 tablespoons of icing sugar
    Lemon juice, jam or fruit (optional)


    Directions


    1.  Preheat oven to 220 degrees. In a bowl add flour, milk, eggs, and nutmeg mix until just combined. Batter will be slightly lumpy.
    2. Melt butter in a 12-inch cast-iron skillet (personally I used a cake tin as I don't own a cast-iron skillet).
    3. Add mixture and transfer to oven. Bake until the pancake is golden brown, 15 to 20 minutes.
    4. Remove from oven and sprinkle with icing sugar; serve immediately.
    5. Add lemon juice, jam ect if you like we topped ours with chunks of watermelon, honeydew and grapes which cuts the sweetness of the icing sugar.

    If you have never tried this pancake give it a go it is SO worth it!
    I also did lots of baking for back to school because this year the aim is not to buy
    packaged snacks for Rhyley's lunches and hopefully I will succeed because then I know exactly what he is eating because I made it.
    I baked Mango & Coconut Muffins (for Jason without coconut), Anzac Cupcakes, Mini Quiches & Mini Tuna Mornay. I will share these recipes soon but first I will share my recipe for Anzac Cupcakes I adapted it from this recipe that I found here I made mine more like you would Anzac biscuits.

    Here's the recipe:

    Anzac Cupcakes
    Ingredients
    2 cups plain flour
    1/2 cup rolled oats
    1/4 cup dessicated coconut
    1 teaspoon of bicarb soda
    A pinch of salt
    125 grams of unsalted butter
    1/2 cup Golden Syrup
    1 cup of milk

    Icing
    1 cup Icing Sugar
    50 grams of unsalted butter
    1 teaspoon of vanilla extract
    1/3 cup Golden Syrup

    Directions

    1. Preheat oven to 180 degrees. In a saucepan melt the butter & syrup together, add bicarb soda to melted butter mix. 
    2. In a bowl add dry ingredients & make a well in the center.
    3. Add melted butter mixture & milk to the dry ingredients, mix well.
    4. Divide mixture into muffin wrappers & bake for 15 - 20 minutes.
    5. For the icing add all ingredients in a bowl and mix together. (See Note)
    6. Spread cupcakes with icing, if desired sprinkle with coconut.
    Note: If icing is too thick add a little milk personally I didn't add milk so I could store the
    icing in a bottle in the fridge to ice the cupcakes after defrosting for lunches.

    So those are some of the recipes I made for lunches this week.
    I bagged up everything, labelled it & popped them in the freezer so there is enough for about
    2 weeks worth of pre-made lunches.

    Until next time,


      Thursday, January 19, 2012

      Our Elf on the Shelf....

      Okay so I know this is a little late, & that I should have posted throughout December
      about our Elf on the Shelf.
      But I was so busy planning ideas for Elf's visit I forgot to post about it all but I guess it's
      better late than never!
      So since joining Pinterest I had seen lots of pins for Elf ideas, when I looked into these a
      little more I realised it was an awesome way to encourage good behaviour in the lead
      up to Christmas.
      Such a tool is always welcome when you have a child, so I discussed the idea with Jason &
      we decided to buy an Elf for Rhyley.

      In Australia they don't sell Elf on the Shelf in stores so I jumped on Ebay & ordered one!
      When he finally arrived we planned that our Elf would arrive the day Rhyley got back
      from camp which meant that we would have to come up with a whole month's worth of
      Elf of the Shelf ideas.

      Here are our photos of our Elf - Bumble aka SuperElf!

       Day 1 - Bumble arrived with his special book

      Day 2 - Bumble was found climbing the kitchen blind

       Day 3 - Here he is in the light shade

       Day 4 - Shootin' some hoops!

       Day 5 - CANDY DIVING!!!!

       
      Day 6 - Bumble left a little note for Rhyley

      Day 7 - Stuck in the cookie jar!
       
       Day 8 - It's been a loooong day!

       Day 9 - Hangin' with dinosaurs!

      Day 10 - Oh my what have you done!


      Day 11 - Bumble left this..... 

       ....he painted a red nose on Rhyley 
      & stuck stickers on him hehe...

       Day 12 - Bumble decided to make breakfast a 
      Smoothie for Rhyley & some odd candy 
      & tabasco concoction

       Day 13 - Bumble made Marshmallow Poppers 
      for Rhyley with detailed instructions


       Day 14 - I wonder what is in the egg?!

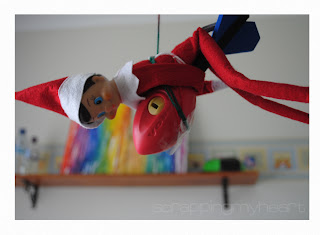
       Day 15 - Daredevil Bumble!


      Day 16 - Hanging from the ceiling fan 
      on a Nerf Vortex Howler

      Day 17 - Roasting marshmallows


      Day 18 - Check himself out in a skirt?!?!

      Day 19 - Hanging in the shower with a 
      water pistol

      Day 20 - Skateboarding on the windowsill
      (Last day at home before going on 
      holiday with Rhyley)

      Day 21 - Making a snowman in 
      Aunty Mel's freezer


      Day 22 - All tied up after trying 
      to pinch Aunty Mel's earrings

      Day 23 - At Grandma's with Rhyley's 
      breakfast cereal

      Day 24 - First day at Nanny & Poppy's
      looking in the pot plant for frogs!

      Day 25 - Pretending the shell is a sleigh

      Day 26 - Chillin' under the Christmas tree

      Day 27 - Fishing with the gnomes in the 
      frog pond

      Day 28 - Checking out where Australia 
      is on the globe

      Day 29 - Supporting the WRONG footy team!

      Day 30 - Hiding in Nanny's doll cupboard

      Day 31 - Helping out feeding the dogs!

      We had so much fun with Bumble visiting & we can't wait until he comes to visit this Christmas!
      So that is our month with Bumble aka SuperElf our Elf on the Shelf.

      Until next time,